Scheduling Scenario Examples
This guide will walk you through the creation of some sample Schedule Sets for common scheduling scenarios: 5-Day Rotation, A-Day / B-Day, and Labs.
Most of the instructions in this guide deal with creating Blocks, Schedule sets, and Schedule rules. Before you get to these steps, you will need to publish the school year. For instructions on the rest of the scheduling process (including publishing the school year, setting up Buildings and Rooms, configuring Courses, generating the Master Schedule, and generating the Student Schedule), see The Scheduling Guide.
For a tutorial on setting up student course
5-Day Rotation
Let's start with a fairly straightforward schedule. In this example, we'll set up academic Blocks and a Schedule set at a school where classes meet within the same time slots every weekday.
Blocks
In Academics, go to the Scheduling menu and select Schedule outline. Open the Blocks tab.
Remember that Blocks are time-based containers for course sections. A Block occurs at a defined time each day, and multiple classes can meet during that time,.
Tip: It is important to remember that a Block can only be used in one schedule set. If your school wants to have multiple schedule sets (for example, Spring Academics and Spring Activities), you will need to create unique Blocks to go with each schedule set (for example, Academics A Block and Activities A Block).
|
1. Make sure you are in the correct School level (Upper School). 2. Select + Add Block to create the first block. 3. The Group Type for the first block is Academics, the Block type is Academics, and the Block name is A. 4. Set the status to Active, then Save & Add Another. |
|
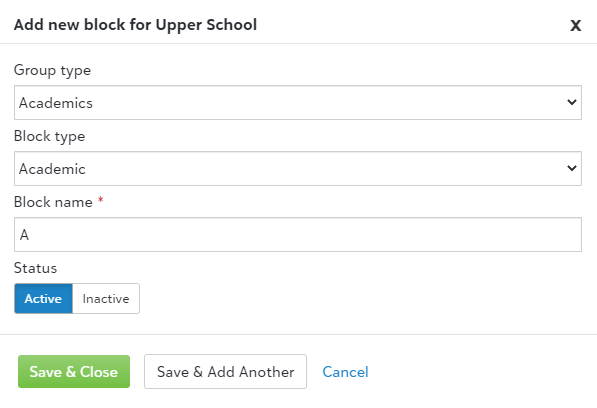
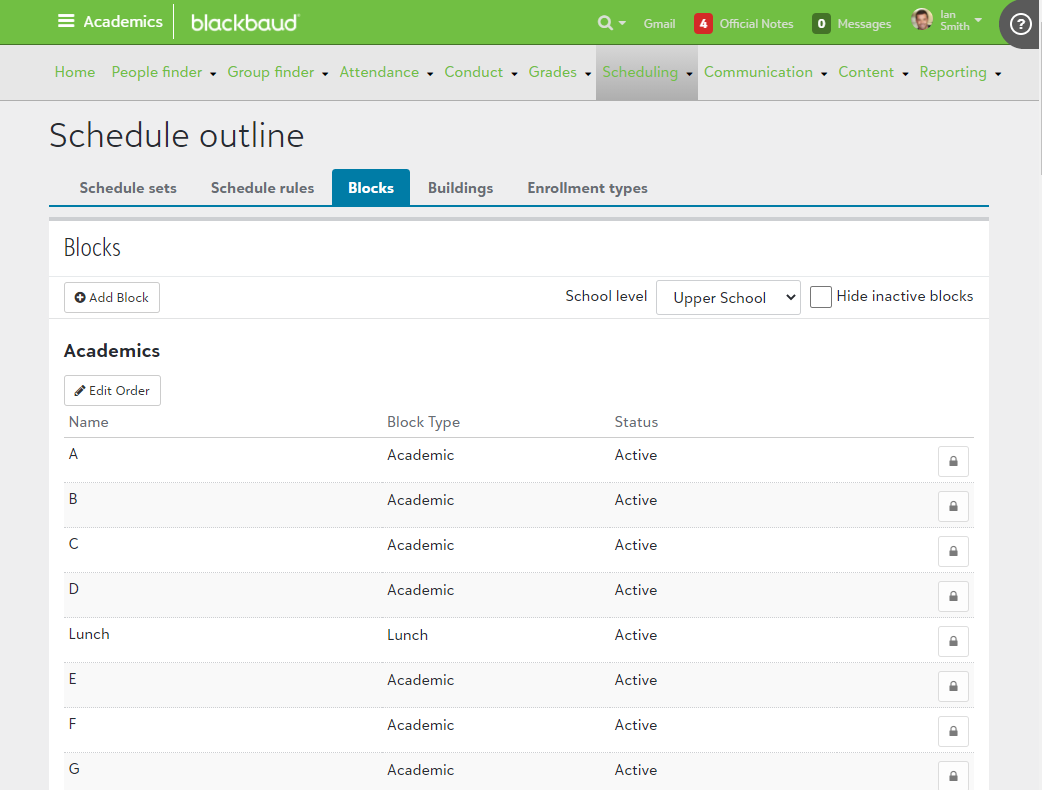
5. Our school in this example divides its day into 8 periods, with a shorter 5th period for lunch. We'll name the 8 Blocks the following: A, B, C, D, Lunch, E, F, and G.
Keep using Save & Add Another until you have created all 8 Blocks. The only difference for the Lunch block is that the Block type should be set to Lunch. When you are finished, select Save & Close. You will see the Blocks you just created in a list below Academics.
Schedule sets
Next, go to the Schedule sets tab.
Check the Year, Group, and Level settings to make sure you are editing schedule sets for the desired courses. In this case, I am creating an Academics schedule set for the Upper School in the 2020-2021 academic year.
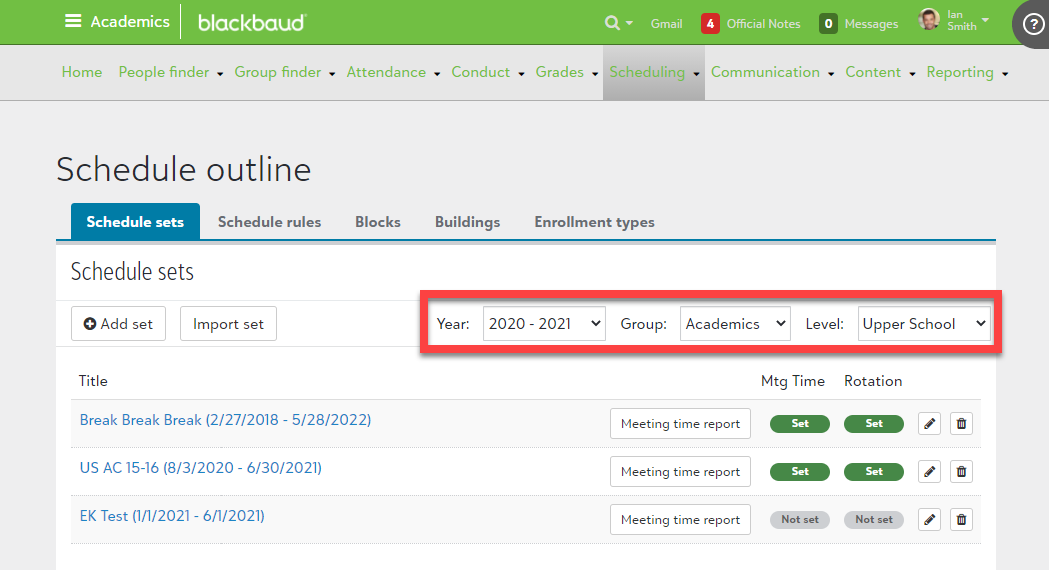
Select + Add set. This will open a new Edit Schedule Set window.
General
|
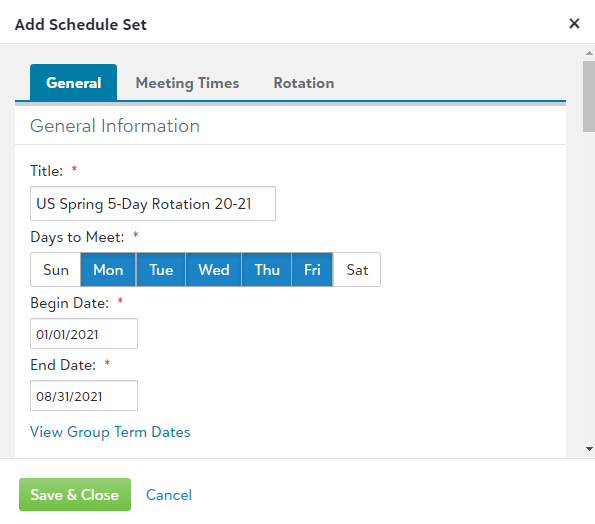
1. Give the schedule set a Title. We'll call this one "US Spring 5-Day Rotation 20-21." 2. Select the Days to Meet: Monday through Friday. 3. Choose a Begin Date and End Date for the schedule set. In this case, I want the schedule set dates to match the dates for the 2nd Semester. Can't remember the term dates off the top of your head? By selecting View Group Term Dates, you can see the start and end dates for the academic term. |
|
|
4. Under Access Dates, set the dates on which members of the community can view the schedule. For the purpose of course 5. Under Date Span, enter the following:
|
|
6. Scroll back to the top of the Add Schedule Set window and select the Meeting Times tab.
Meeting Times
1. Start by creating a pattern of meeting times. For # of Times, we'll enter the number of class periods in the school day: 8. Select + Add Pattern
|
2. Classes meet every weekday, so select Mon, Tue, Wed, Thu, and Fri at the top. 3. Add start and end times for each Meeting Time. |
|
Tip: One of the most common mistakes people make in this step is accidentally entering PM instead of AM, or vice versa. Double-check your times before advancing to the next step, because this small mistake can create some scheduling headaches later in the process.
4. Scroll back to the top of the Add Schedule Set window and open the Rotation tab.
Rotation
On the Rotation tab, we will select a Block for each Meeting Time. Please note that your school has to already have Blocks set up in order for them to appear in drop-down menus on this page. Later in the scheduling process, when Course Sections have been created, you will tie Blocks to Course Sections.
|
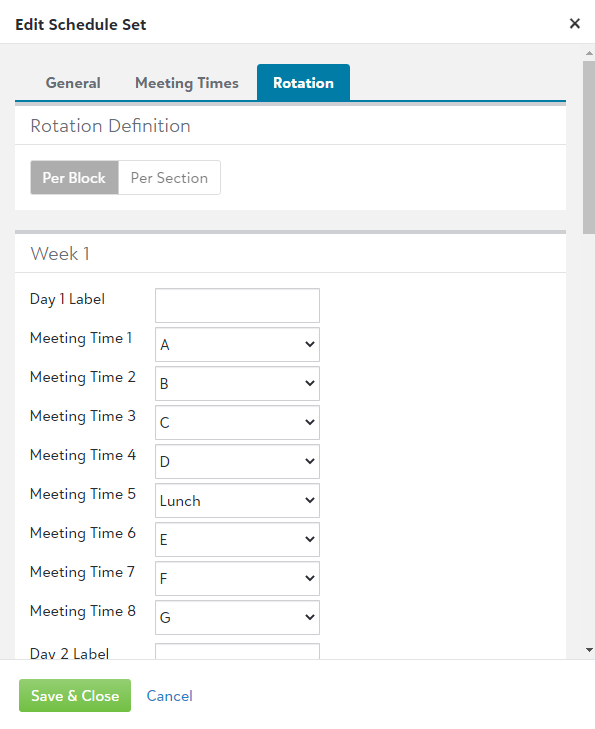
1. On the Rotation tab, leave the Rotation Definition set to Per Block. (The "Per Section" option only applies if you are creating a random rotation.) 2. Day labels are optional. Because this is a simple schedule set, we will leave these blank. 3. For each Meeting Time, select a Block from the dropdown menu. If you can't remember the time slot for a Meeting Time, you can always open the Meeting Times tab again to check. |
|
4. Select Save & Close.
A-Day / B-Day
In this example, we'll set up Blocks and Schedule sets for a school that operates on an A-Day / B-Day rotation. If Monday is an A Day, then Tuesday is a B Day, Wednesday is an A Day, and so on throughout the academic term.
Every day, whether an A Day or a B Day, starts with a 55-minute assembly followed by a 25-minute homeroom. After that, the student body is divided into two cohorts. Our school's colors are red and blue, so we decided to call the two cohorts of students "Red Group" and "Blue Group."
On A Days, Blue Group students attend eight 40-minute class periods while Red Group students attend four 80-minute class periods.
On B Days, the two cohorts of students switch so that Red Group students attend eight 40-minute class periods while Blue Group students attend four 80-minute class periods.
Blocks
In Academics, go to the Scheduling menu and select Schedule outline. Open the Blocks tab.
Tip: It is important to remember that a Block can only be used in one schedule set. If your school wants to have multiple schedule sets (for example, Spring Academics and Spring Activities), you will need to create unique Blocks to go with each schedule set (for example, Academics A Block and Activities A Block).
|
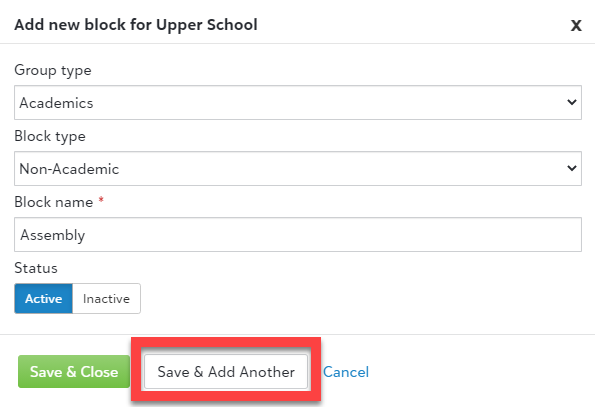
1. Make sure you are in the correct School level (Upper School). Select + Add Block. 2. Create the first block of the day, which we'll call "Assembly." Set the Group type to Academics, the Block type to Non-Academic, and the Block name to Assembly. 3. Set the status to Active, then Save & Add Another. |
|
4. Next, we'll create a homeroom Block. Apply these settings:
-
Group type: Academics
-
Block type: Homeroom
-
Block name: Homeroom
-
Status: Active
5. Select Save & Add Another.
6. Now we will create the blocks specific to the two student cohorts, Red Group and Blue Group. Apply these settings to create the Red Group's A-Day 1st-period Block, which we will call "Red A 1":
-
Group type: Academics
-
Block type: Academic
-
Block name: Red A 1
-
Status: Active
7. Select Save & Add Another.
|
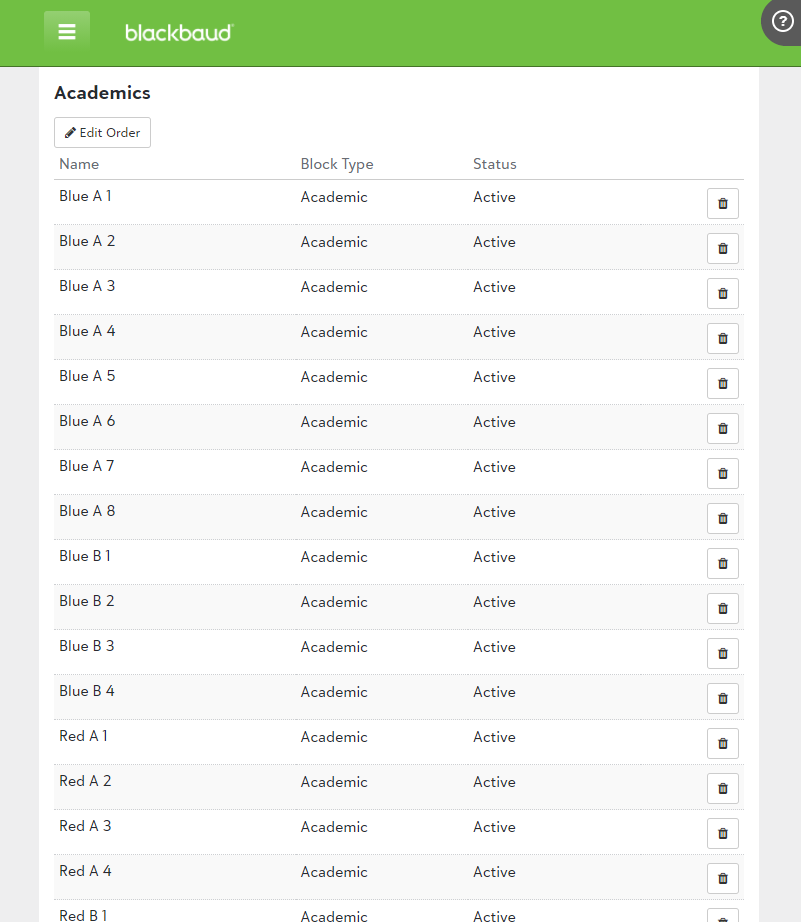
8. Keep creating Blocks until you have all of the following Academics Blocks:
|
|
Schedule sets
Next, go to the Schedule sets tab.
Check the Year, Group, and Level settings to make sure you are editing schedule sets for the desired courses. In this case, I am creating an Academics schedule set for the Upper School in the 2020-2021 academic year.
Select + Add set. This will open a new Edit Schedule Set window.
General
1. Enter the following under General Information:
-
Title: A-B Academics Spring 20-21
-
Days to Meet: Monday through Friday
-
Begin Date and End Date: Select View Group Term Dates to see the spring semester begin and end dates. Enter those dates here.
2. Set Access Dates for users according to their roles.
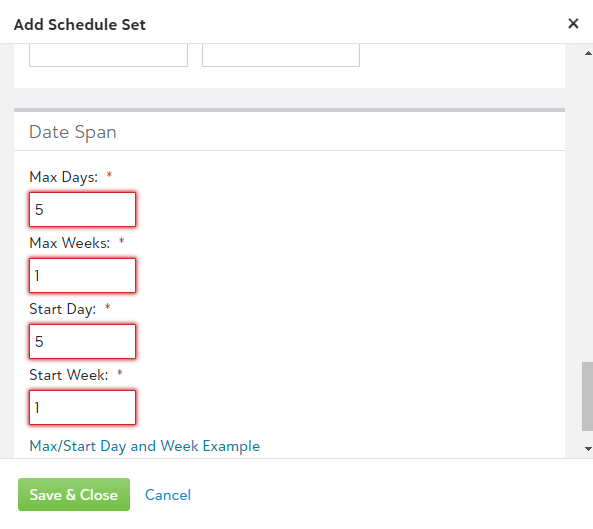
3. Under Date Span, enter the following numbers:
-
Max Days: 2. The number of days in this rotation cycle is 2 (A Day and B Day).
-
Max Weeks: 1. Because every week follows the same pattern in this example, we are saying here that the rotation cycle lasts 1 week.
-
Start Day: 5. This number indicates the day of the week when the schedule set starts, where Monday is 1, Tuesday is 2, etc. Because the 2nd Semester starts on a Friday in this example, enter the number 5 for Friday.
-
Start Week: 1. Because there is only one week in the rotation (as established by the Max Weeks number), enter 1 here. If we had set up a schedule with 3 weeks in the rotation, we could put the number 1, 2, or 3 here to indicate which week of the rotation to start with.
4. Scroll back to the top of the Add Schedule Set window and select the Meeting Times tab.
Meeting Times
1. The number you enter for # of Times represents the number of time slots in a school day. In the case of our school, A Days and B Days will have the same number of time slots, so let's count the time slots for an A Day.
We know that an A Day contains 8 class periods for Blue Group, 4 class periods for Red Group, plus the other 3 periods that every student attends: Assembly, Homeroom, and Lunch. That adds up to 15 time slots.
Enter 15 for # of Times and then select + Add Pattern.
2. Classes meet every weekday, so select Mon, Tue, Wed, Thu, and Fri at the top.
3. Next, we will enter start and stop times for each Meeting Time. But first, let's do some planning.
Because the rotation pattern can be hard to visualize, consider writing out a list or making a spreadsheet with all of the following information on each row:
-
Meeting Time
-
Start Time
-
End Time
-
A Day Block
-
B Day Block
Here is a sample spreadsheet for our example school:
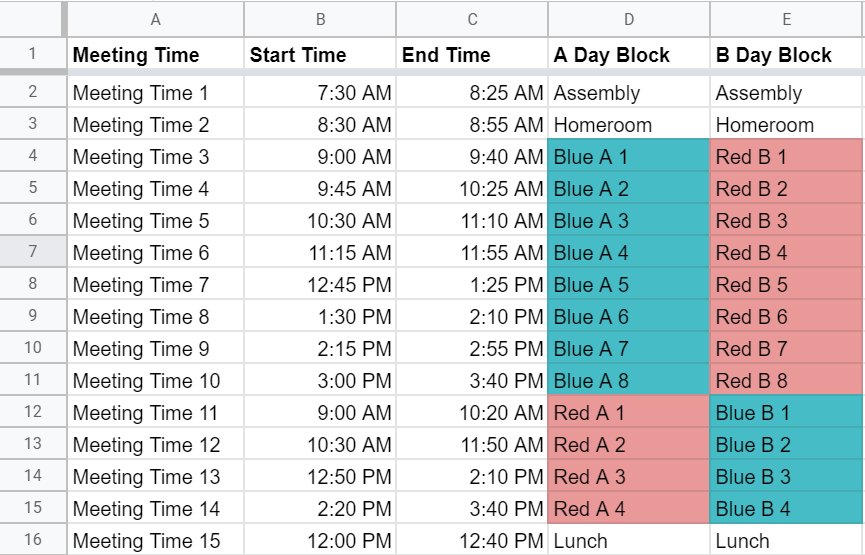
You will tie a Block to each Meeting Time for A Days and B Days on the next tab (Rotation). It helps to plan out the Blocks ahead of time so that you don't have to flip back and forth between the Meeting Times tab and the Rotation tab.
|
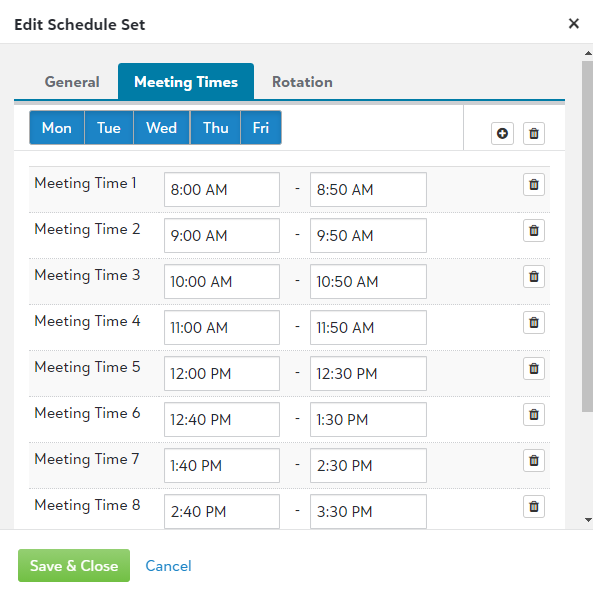
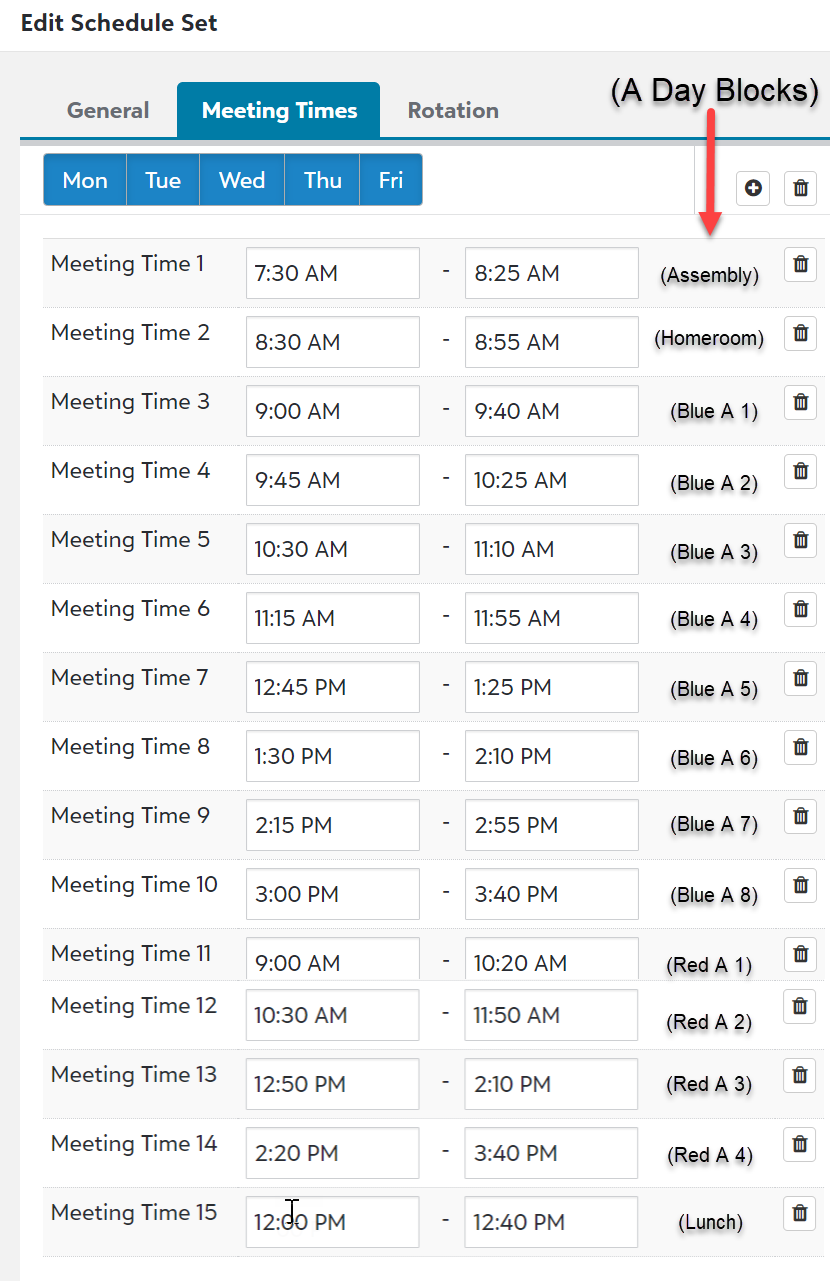
4. Enter start and stop times for each Meeting Time. To help you visualize how these connect to Blocks, here is a set of Meeting Times with the corresponding A-Day Block written beside each row in parentheses. Tip: One of the most common mistakes people make in this step is accidentally entering PM instead of AM, or vice versa. Double-check your times before advancing to the next step, because this small mistake can create some scheduling headaches later in the process. |
|
5. Open the Rotation tab.
Rotation
On the Rotation tab, we will select a Block for each Meeting Time.
Note: Your school has to already have Blocks set up and marked Active in order for them to appear in drop-down menus on this page. Later in the scheduling process, when Course Sections have been created, you will tie Blocks to Course Sections.
1. Leave the Rotation Definition set to Per Block. (The "Per Section" option only applies if you are creating a random rotation.)
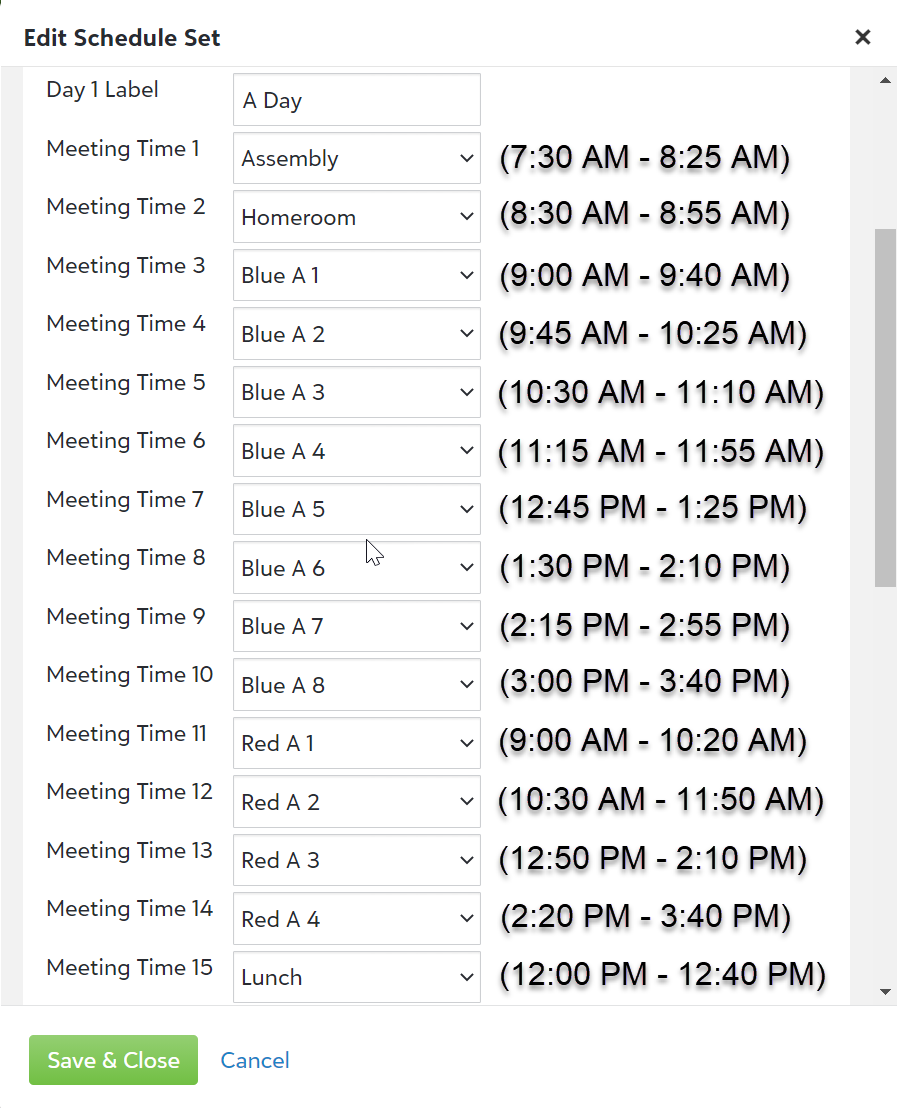
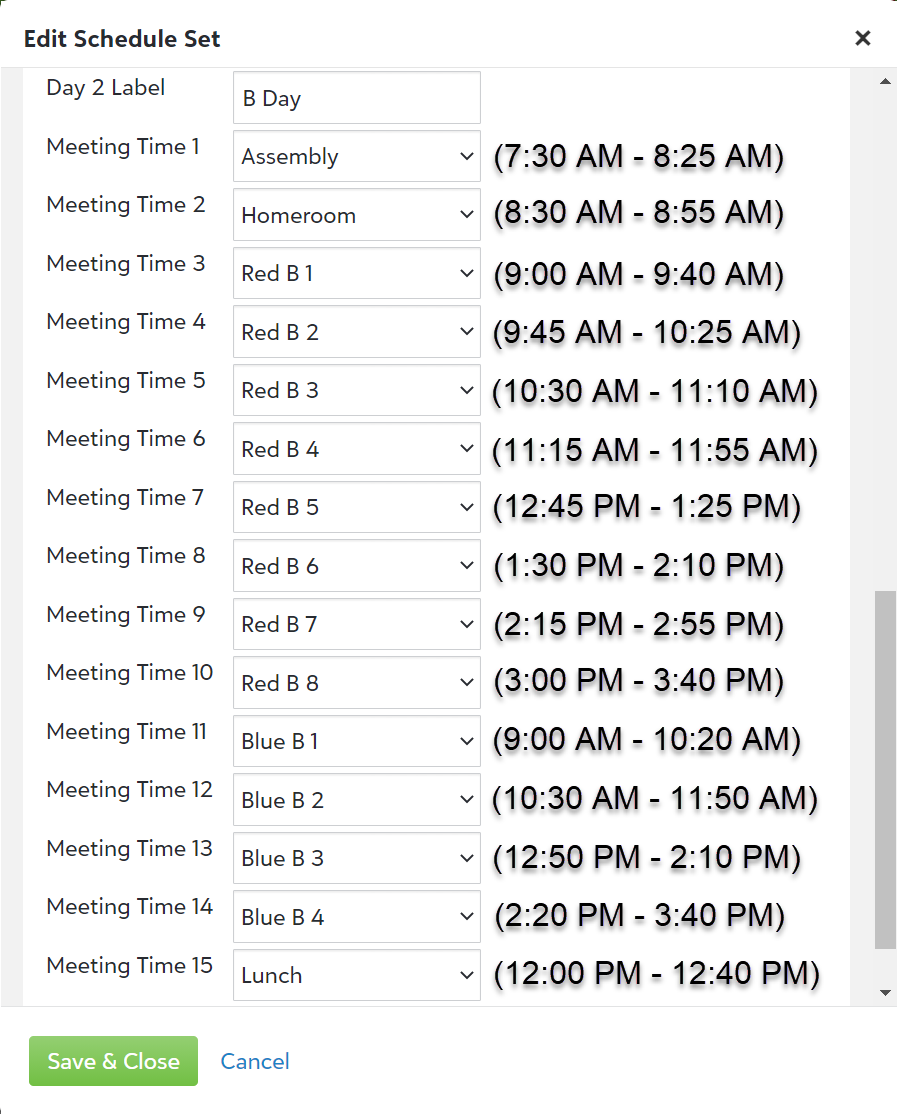
2. For the Day 1 Label, enter A Day. The Day 2 Label is B Day.
3. Using the spreadsheet from earlier in the process, select the appropriate Block for each Meeting Time. To clarify how Meeting Times and Blocks line up, here are the A Day and B Day rotations with the start and end times for each Meeting Time in parentheses:
|
|
|
4. Select Save & Close.
Labs
In this example, we'll set up a Schedule rule for a school that needs to pair a science course with a laboratory period. Schools often use this type of rule for science courses with a lab requirement, but the same logic can apply to other courses, such as a theater course with a required rehearsal time.
In this example, we will start with the Blocks and Schedule set we created for the 5-Day Rotation example above. Our school has also created at least two courses: Biology and Biology Lab. All of our work will take place in another tab on the Schedule outline page: Schedule rules.
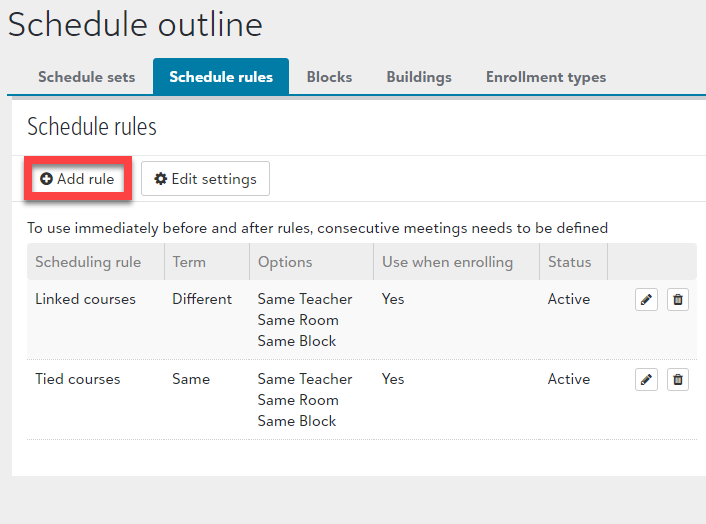
1. On the Schedule outline page, open the Schedule rules tab.
2. Select + Add rule. This will open a new dialog called Add scheduling rule.
3. Under General, give the schedule rule a Name: "Schedule together." Leave the Status set to Active.
|
4. Under Rule details, choose the following settings:
|
|
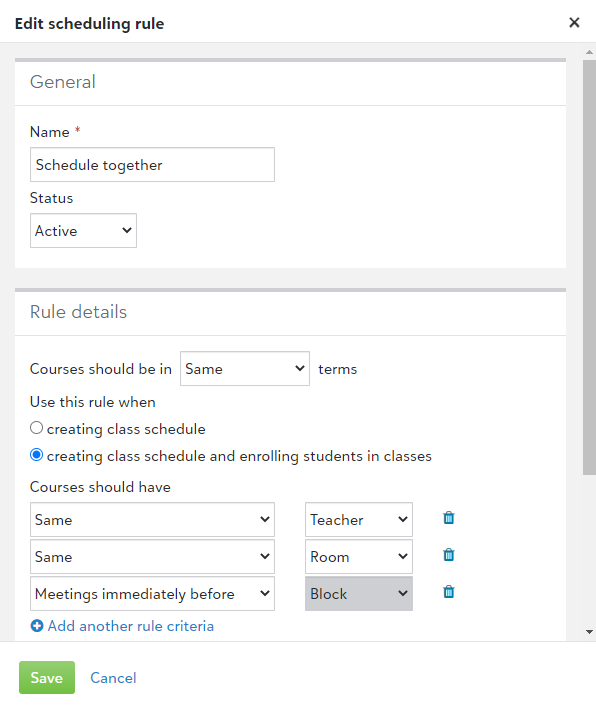
5. Under Course pairs, select + Add another course pair. In the first box, search for and select the name of the Biology classroom course ("Biology," in this case). In the second box, search for ans elect the name of the Biology laboratory course ("Biology lab").
6. Select Save. The new rule now appears on the Schedule rules list, and it will apply when you go to create a class schedule and enroll students in classes.